


One of the perks of working at Make: is that you’re the first to see some of the fun projects and kits that bubble up from Maker Faires all over the world. I first spotted the Cardboard Teck Instantute (yes, that’s their name) and their Pinbox 3000 kit through Dale Dougherty’s report from the 2015 National Maker Faire. As a pinball nerd, it spoke to me, and I’ve been waiting anxiously for the kit to ship.
Last week, I finally got my hands on the Core kit, which retails for around $50 and includes the base of their desktop cardboard pinball machine along with two swappable playfields. The whole kit ships as 12 pre-cut sheets of cardboard, measuring 14″×23.5″, along with an instruction booklet. Also included is a small bag of hardware, which consists of plastic pop rivets, rubber bands, marbles, and a paperclip bent into a makeshift hook.

To look at it as an unbuilt kit, my cheapskate heart had a hard time believing I had paid $50 for box of cardboard. Which isn’t to say that the guys at CTI hadn’t done an outstanding job on a bunch of fun little packaging details inside and out. The kit looks great. It’s just that in my mind, I know it’s all cardboard.
But, I’m happy to report that once the Pinbox 3000 is built and sitting on your table, you absolutely see the value. It would take $100 for me to part with my custom machine at this point, and even then I would be a little sentimental about it.
If you haven’t bought yours yet, it’s also worth mentioning that if you buy two, you can set them up in a head-to-head battle mode where the marble can pass back and forth between the two machines. It’s a fun option, and if you’re already putting down money for shipping it may be worth going all in. There’s also an Arduino-based add-on kit that allows you to add sound and scoring elements. I haven’t tried that, but I can assure you that the basic system without any electronics is more fun than you’d think.
The Build
There are only three things to know before constructing your Pinbox. First, it’s going to take you around 60-90 minutes to construct. Second, there’s an official step-by-step construction video on YouTube. They nail the construction in just 40 minutes on the video, but they’re pros. Third, there are no tools required. A pair of scissors is useful for liberating some of the more stubborn parts, but there’s no gluing or taping or stapling.

For the most part, everything fits together using folds and tabs. In a few spots you’ll use the included plastic pop rivets to hold things together, but the rest is designed with some ingenious cardboard origami mojo. The printed instructions to a great job illustrating the different folds, none of which are too complicated. The fact that the cardboard is scored in such a way that the folds naturally bend in only one direction also helps eliminate some confusion.
Pinball Wizardry
This is a project where you need to wear two hats – one to methodically assemble it, and one to dream up and experiment with playfield design. Personally, I love that about this project. There’s something for both the right-brain and left-brain.
That said, after putting everything together I had to take a mental break before approaching it again with intent to paint and poke holes in it. It helped that my son came home from school a few hours after I had finished assembling it, and could look at the Pinbox purely as a blank canvas.

I let him do whatever he wanted to the first playfield, with the understanding that I would get the second one all to myself. The back pages of the instruction booklet outline a number of design ideas, including wine cork bumpers, ramps, ball traps, hinged doors – all kinds of inspiration.
He loved it. And here’s the real value of a kit like this, it totally absorbed him creatively. For a few days, he’d wake up in the morning, drag the Pinbox off the table and into his room, and just go right to work on decorating and customizing it. It was great to see.
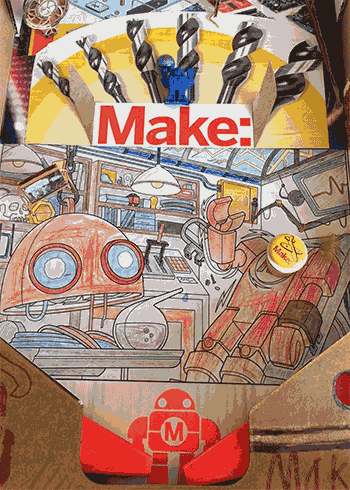
The following weekend I got around to making my playfield. I did a rough wash of flat white house paint on it, which I highlighted in a few places with some day-glo spraypaint. The centerpiece is an illustration that artist Josh Ellingson made for the Maker Media Lab that I printed out and colored with my son. I hit that up with some Mod Podge, along with a collage of elements from the past few issues of Make: magazine. I think it’s pretty rad.


Another great little feature that the Cardboard Teck Instantute guys built into the Pinbox is a hanger on the bottom that you can use to store it on a wall. I call this hook the marriage-saver, since I think my wife would kill me if I kept this out on the dining room table all the time. It’s also an acknowledgement that the finished result is as much a work of kinetic art as it is a game.
We’ve had the Pinbox 3000 in our house for a few weeks now and it’s held up nicely. My son even had a group of friends come over and mercilessly play the game for a good 20 minutes, and it’s no worse for wear.
Whether or not your pinball love runs as deeply as my own, I recommend giving this kit a try. It’s a fun, low-stress build, a fun conversation piece, and a great project for kids. You can pick one up on Maker Shed, and I’d love to see your designs, so share them here or email them to me (donald@makermedia.com).
ADVERTISEMENT
Join Make: Community Today


