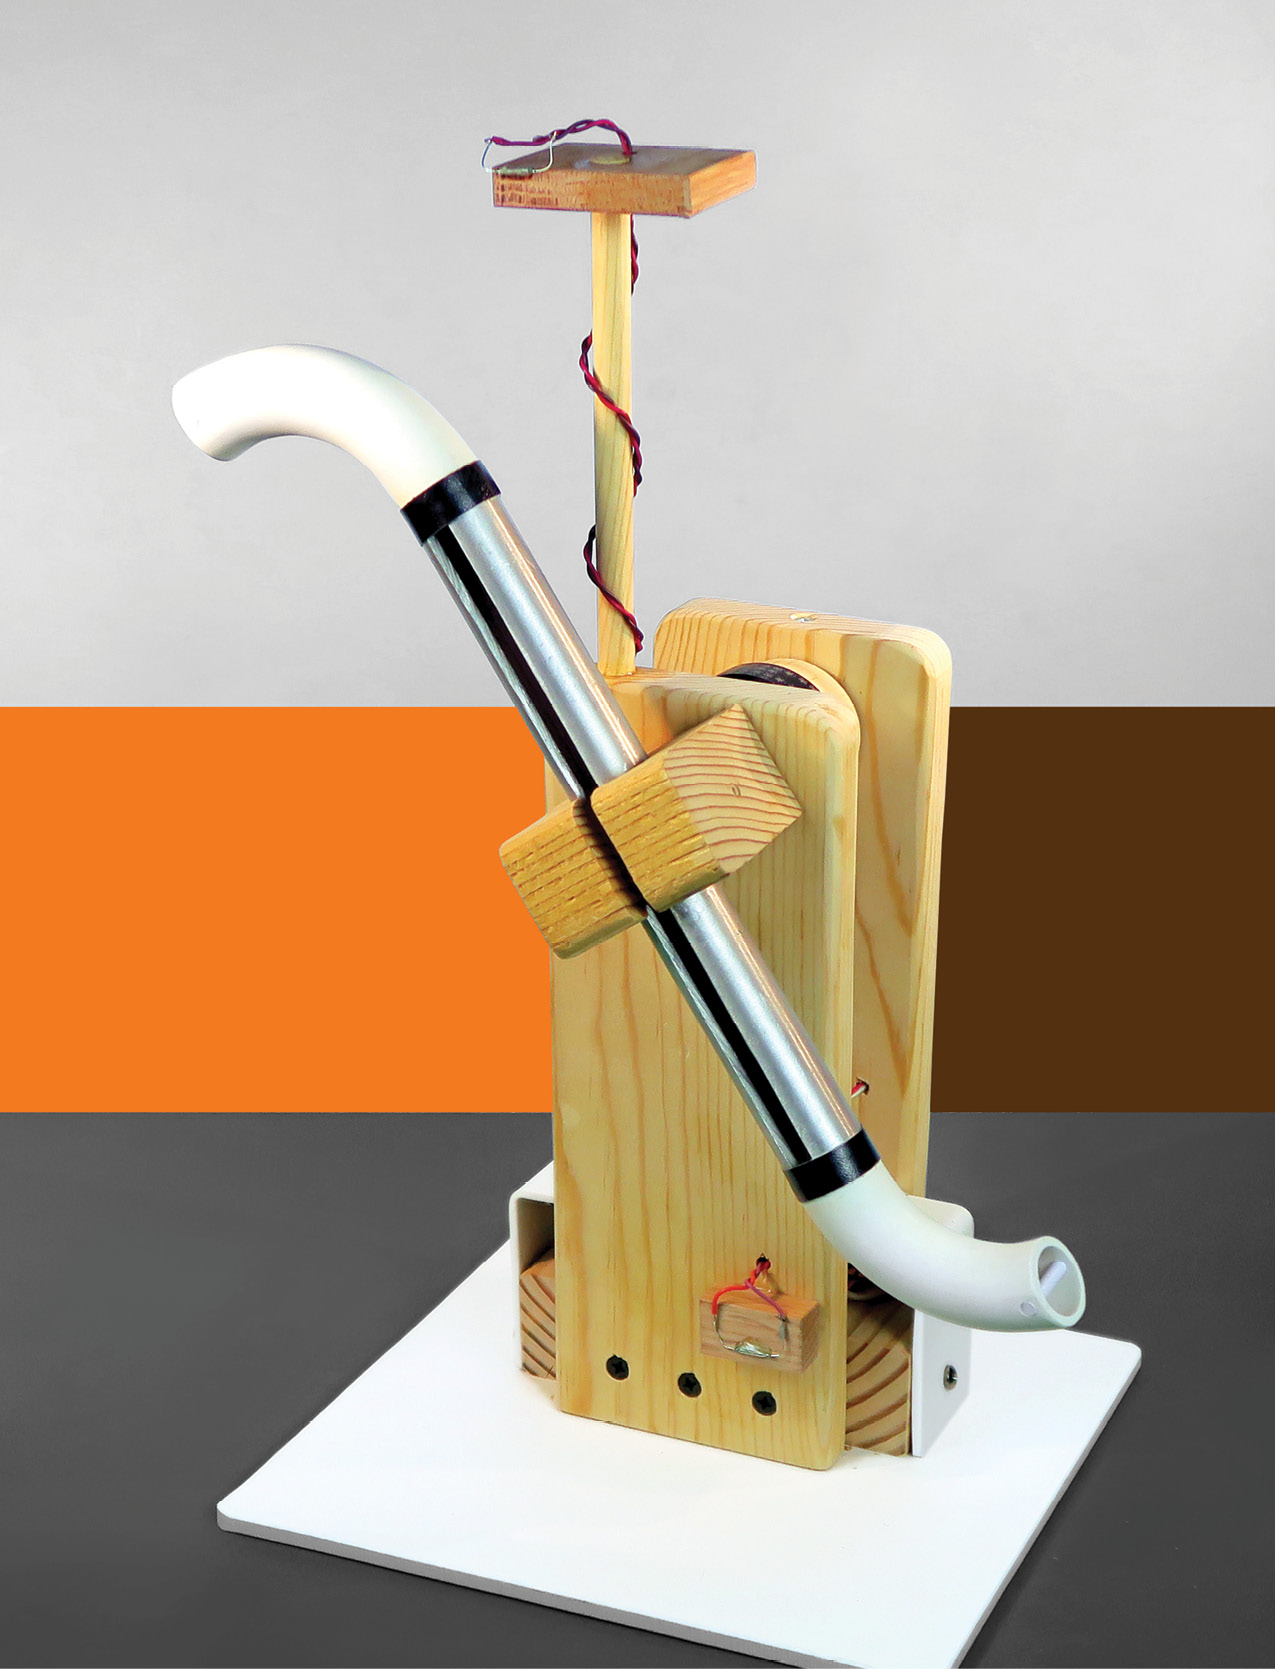
An hourglass is a beautiful object, but it has problems. If it runs a little too fast or slow, there’s no way to adjust it. Sometimes the sand inside clogs up when two particles try to enter the neck side by side, and you have to shake it to start the sand flowing again. Even when it’s working right, a typical palm-sized hourglass has to be turned upside-down repeatedly to measure intervals beyond a couple of minutes.

I decided that a redesign was overdue.

Project Steps

CONCEPT

My first step was to change the name. I wasn’t going to be measuring hours, and I wouldn’t try to work with glass, so I called my gadget a Time Tube.

To prevent particles from clogging, I adopted the radical concept of using just one particle. Of course a single falling particle can only measure very brief intervals of time, but when you drop a magnet through a copper or aluminum tube, it falls surprisingly slowly as a result of creating eddy currents. (See “Dropping the Ball” on page 31.) Actually a 5/8″ spherical neodymium magnet will descend at about 9 inches per second, after which the tube must still be turned upside-down, hourglass-style — but I would use a motor to take care of that.

Above is a diagram of the concept. As the ball reaches the bottom of the tube, its magnetic field closes the contacts of a reed switch. (You can learn more about reed switches in my book Make: Electronics.) The reed switch triggers a relay, which starts a motor. The motor rotates the tube 180°, and the magnetic ball trips another reed switch, which shuts off the motor. The ball falls through the tube again, and the cycle repeats.

The lower reed switch, or the pushbutton in parallel with it, will energize Relay B, pulling its movable contacts downward. (Some relays move the contacts in the opposite direction — check your datasheet to make sure.) In my schematic, the right-hand contacts start the motor while the left-hand contacts cause the relay to continue energizing itself even when the reed switch opens.

The motor keeps running until the upper reed switch triggers Relay B, opening its contacts, which are normally closed. This shuts off Relay A, so the motor stops while the ball starts to fall.

MATERIALS AND FABRICATION

I decided that my first Time Tube would just be a proof-of-concept design, to keep things simple. I wasn’t sure of the optimal magnet size, so I chose one that’s 5/8″ in diameter, to fit inside an aluminum tube of 1″ external diameter, with walls 1/8″ thick, allowing a 3/4″ internal diameter. Tubing of these dimensions is very easy to find.

I used a piece of tube only 9″ long, so that I wouldn’t need an elaborate structure and a large motor. Also, a short tube would be easier to photograph.

I cut a slot along the length of the tube to reveal the ball as it falls. If you do this, I suggest using an abrasive wheel on a handheld circular saw. Clamp two strips of wood horizontally on either side of the tube to support the saw while it slides along. Apply the clamps very firmly, wear eye protection, and do not use a wood-cutting blade!

Imagine a piece of 1″x18″ tube resting on workbench. Place a block measuring 1″ high, 18″ long, 2″ wide, beside the tube, parallel and touching. Another block on the other side, likewise. Apply clamp resting horizontally on the workbench crosswise, clamping the two blocks and the tube as a sandwich. Another clamp the other end, same. Now the saw can slide on the blocks with the blade dipping into the tube. The clamps are too low to get in the way. But there is still the problem of the clamped assembly shifting. Many workbenches allow you to insert a peg as a stop. Alternatively you could rest a 3-foot piece of 1×4 across the bench and clamp it into place, with the clamps far enough apart to allow the saw to slide between them. The 1×4 now stops the tube assembly from sliding.

Now you need to cap each end of the tube with a short piece of PVC pipe, curved so that when the tube rotates, the ball won’t fall again until the tube is vertical. You can use off-the-shelf PVC elbows from the plumbing department of a hardware store, but I chose to bend my own.

To do this yourself, first insert a long extension spring in the pipe to stop it from kinking. Apply a heat gun, turning the pipe frequently till it gets soft. Then bend it and squirt water on it to set it. Wear gloves that have some thermal insulation.

The falling magnetic ball will stop if it passes anything made of steel, so you can’t mount the tube on a steel shaft. I inserted it in a hole in a block of wood and glued that to a shaft of low-friction nylon tube that I happened to have. You can use wooden dowel instead, but you may have to lubricate it, in which case talcum powder works well.

I used a simple DC gearhead motor.

To increase its torque I connected it with a pulley made from 2″ dowel. The drive belt is from a vacuum cleaner, but a large rubber band may also do the job.

The electronics are housed under a rectangle of 1/8″ ABS plastic or ¼” plywood. The reed switches are glued to small wood blocks, the upper being attached to a vertical length of ½” dowel. The pipe elbows can be capped, or blocked with a nonmagnetic rod or pin.

CALIBRATING YOUR TIME TUBE

If you enjoy the weirdness of the Time Tube but would like it to be just a little more practical, maybe you should add a digital readout. You can do this by triggering an Arduino with the output from one of the relays.

Suppose one full cycle of the Time Tube takes 3.5 seconds, or 7/120ths of a minute. To convert this to minutes, each time the Arduino receives a pulse from the relay it adds 7/120 to an internal floating-point variable, then copies the value to an integer variable, which sends its value to a digital display.

But wait. The Arduino has a perfectly good clock of its own, inside its hardware. So why do you even need a Time Tube?

Well, you don’t. But watching an Arduino isn’t nearly as much fun as watching a neodymium ball floating through a column of air.


DROPPING THE BALL

A magnet falls slowly through an aluminum tube because the magnetic field has to do some work, creating eddy currents in the aluminum. I described this phenomenon in Make: Volume 59  and used it to light LEDs. It’s well known but difficult to measure, so you have to explore it using trial and error.

One thing we do know is that if you move twice as close to a point-sized magnet, it exerts four times as much force. This means that the slowing effect on the falling ball magnet will increase radically if you can find a tube that is only a fraction bigger than the ball.

When you start shopping for aluminum tube, you’ll often find it described by its outside diameter, abbreviated OD and measured in fractions of an inch, while the wall thickness is measured in decimal values of an inch, and you have to figure out the internal diameter (ID) yourself.

I’ll use my test tube as an example.

» OD: 1″

» Wall thickness: 1/8″ = 0.125″

» Subtract double the wall thickness from OD to get ID: 1.0 – 0.125 – 0.125 = 0.75″

» Ball diameter: 5/8″ = 0.625″

» Total gap around the ball: ID minus ball diameter, which is: 0.75 – 0.625 = 0.125″

Shopping online I found some aluminum tube with OD ¾” (0.75″) and walls only 0.028″ thick. So the ID was 0.75 – 0.028 – 0.028 = 0.694″ and therefore the total gap around the ball was 0.694 – 0.625 = 0.069″. When I dropped the ball through this tube, it took a full 5 seconds to fall 3 feet.

Could I do better than that? Yes, I found a piece of tube with ¾” OD but thicker walls, allowing less room inside. The walls were 0.04″ thick, so the internal diameter was 0.75 – 0.04 – 0.04 = 0.67″ and the total gap around the ball was 0.67 – 0.625 = 0.045″. This time the ball took 8 seconds to fall 3 feet!

Objects falling freely under the force of gravity will accelerate, but a ball magnet resisting gravity seems to fall at a constant speed. Therefore, if you double the length of the tube, the ball should take twice as long to reach the bottom.

How much will the speed change when you cut a slot in the tube? I don’t know. If it does change, will the width of the slot make a big difference? I don’t know. Will bigger ball magnets perform better than small ones? I don’t know that, either! The mass of the ball will increase with the cube of its diameter, but who knows, its magnetic field may increase by that much too.

You’ll need to do some experimenting to find out. But bear in mind that a longer, fatter tube and a heavier magnet will require a much more powerful motor to turn the tube upside-down while the ball is sitting at one end.