Randell Vallero, M.D. is a physician working in gastroenterology who’s interested in all sorts of fabrication, including 3D printing. Prompted by PPE shortages, he and his son designed snorkel mask respirators, featured in Make: Volume 73.
This project appears in Make: Vol. 74. Subscribe today for more great project delivered right to your mailbox.
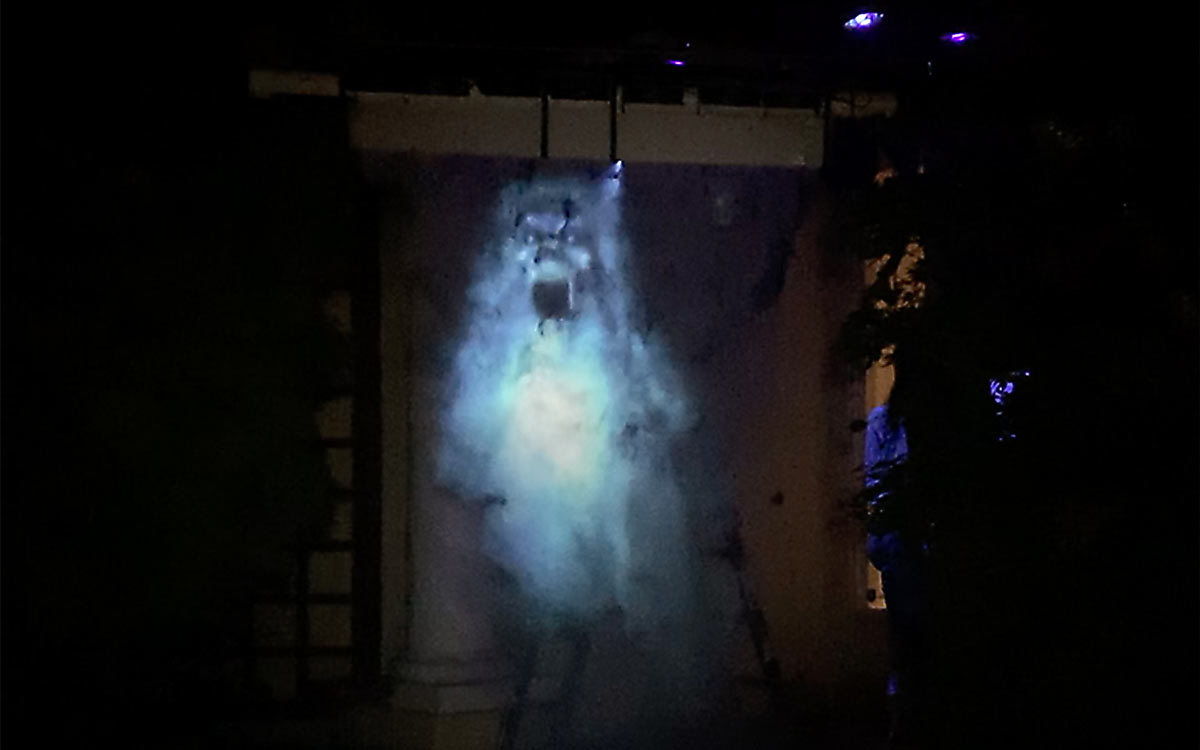
Projecting video on a fog screen creates an awesome ghostly effect. It’s not a novel idea in 2020; there are commercial fog screens for $10,000 (I did find one on Alibaba for $4,000) and some excellent DIY fog screen projects posted online. But none of these met the criteria I wanted; they were either too expensive, too heavy (400lbs!), or too impractical for a simple haunted house effect. I needed a fog screen that was:
Cheap to build, from everyday materials that are easy to source
Lightweight enough to hang over Halloween revelers’ heads without a scaffold
Adaptable to indoor/outdoor conditions such as warm windy days, cool calm days, or rain
Easily deconstructed for storage (in a home that’s already maxed out).
Such a fog screen didn’t exist, so I decided to make my own. In this build I’ll demonstrate how to make the cheap, light, highly adaptable fog screen I use in our yearly Halloween display, for less than $150 (not including your projector or fog machine). You can get all the electronics on Amazon and the rest from a hardware or home improvement store.
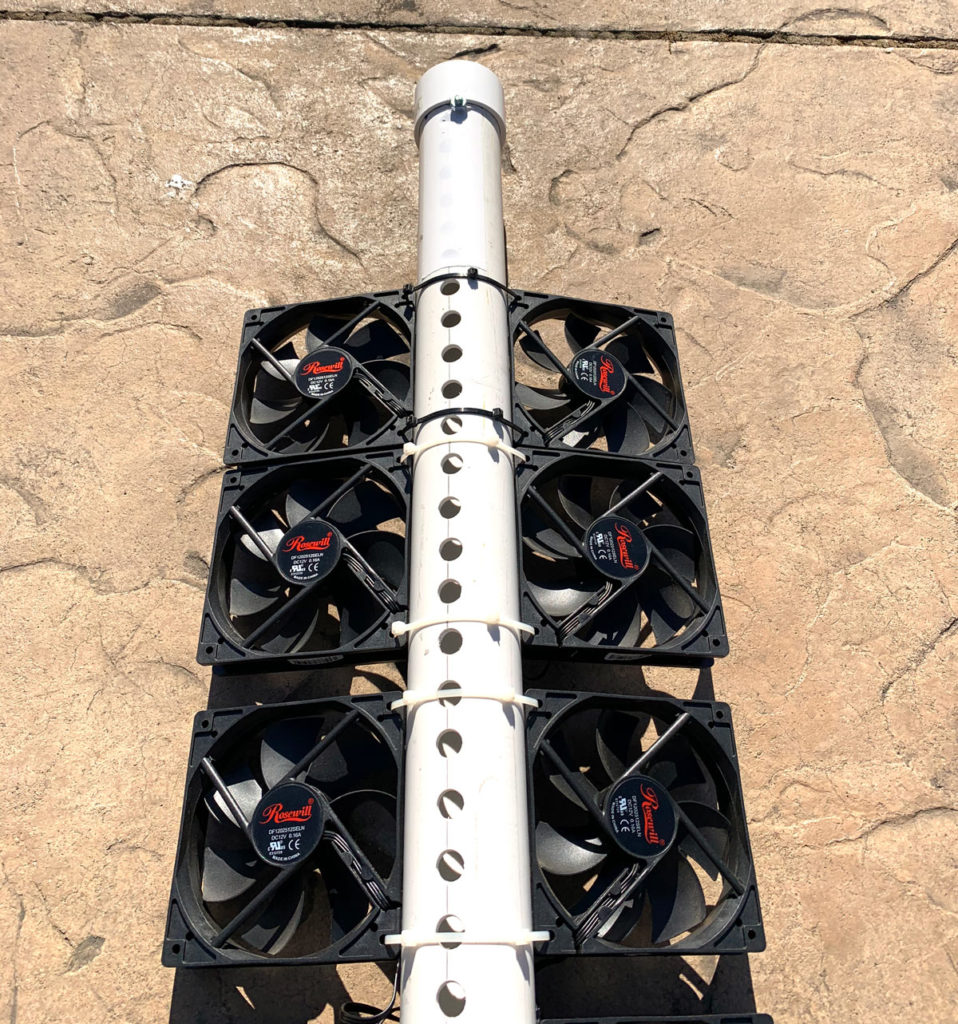
Drill 1/3″ holes spaced 1″ apart in a straight line along the PVC pipe (Figure A). This is where the fog will come out. You can use the entire length of the tube but I found that a 5′-wide fog screen is adequate. Cap one end with the PVC end cap.
Figure BFigure C
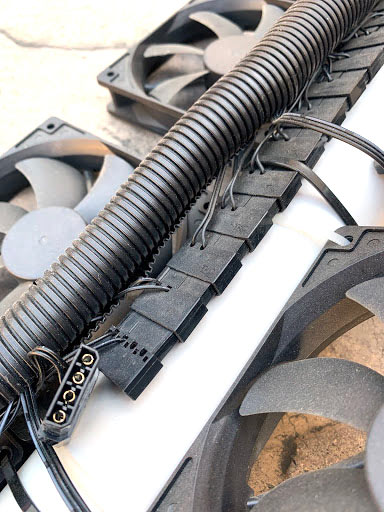
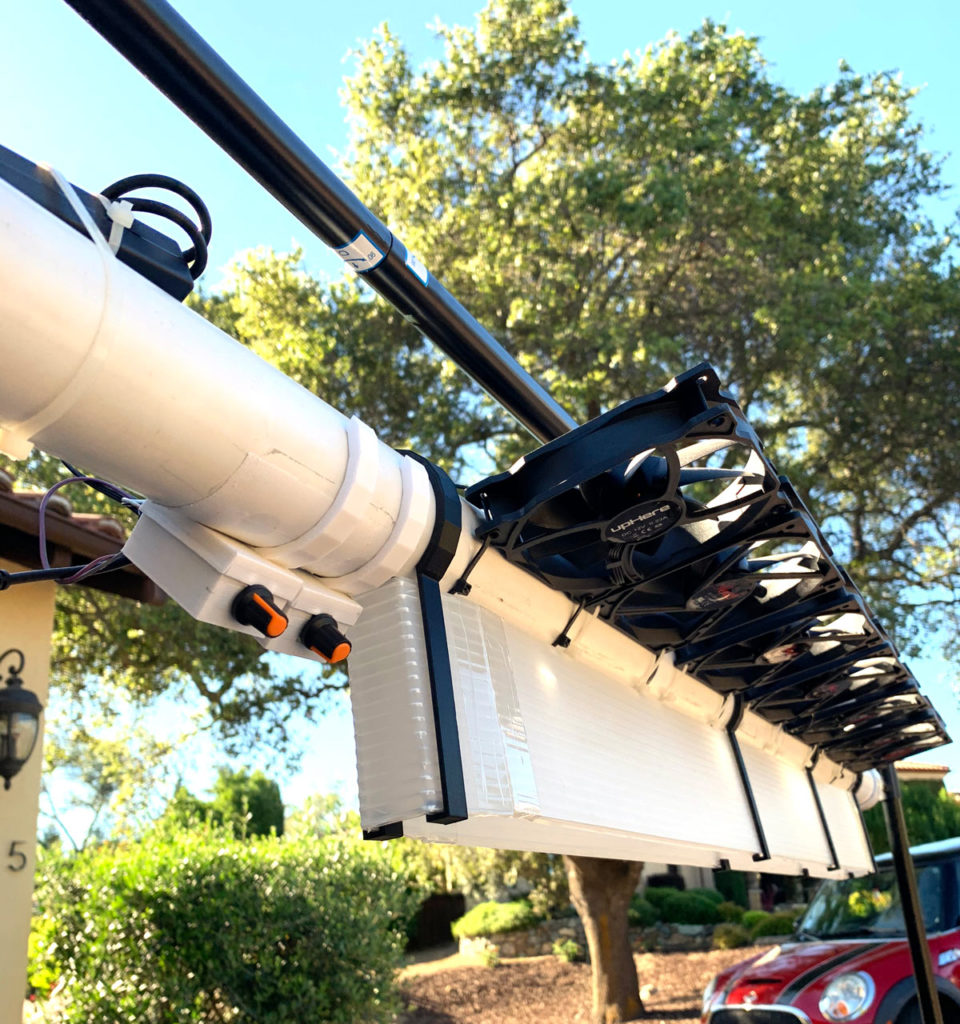
For the screen fans, line up the 120mm computer fans evenly on either side of the holes you just drilled and secure them with zip ties (Figure B). Orient them so the flow of air is in the same direction as the fog exiting the tube. Connect them in parallel by plugging the 4-pin Molex connectors together front-to-back to make one long daisy chain (Figure C). Take the last fan’s 3-pin CPU connector and use jumper wires to connect its motor terminals to one of your DC potentiometers. This will control the speed of all the screen fans on either side of the holes.
Figure D
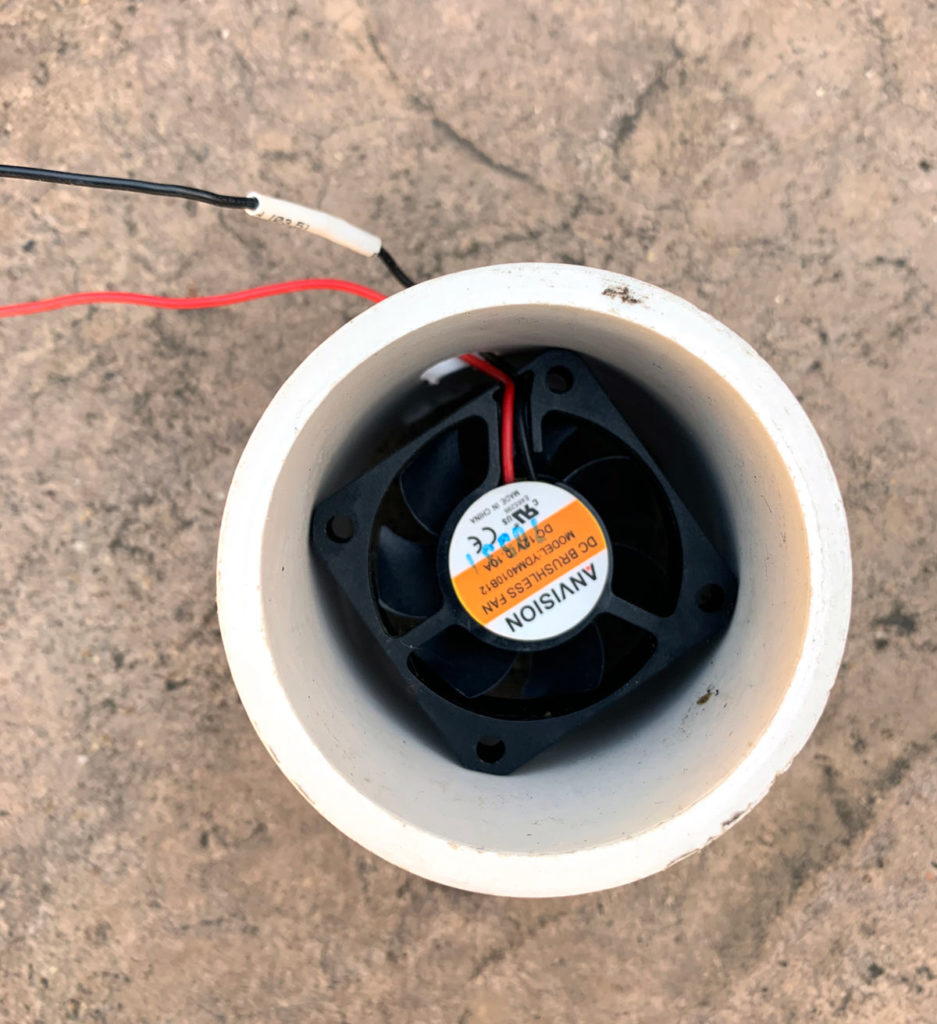
For the fog suction fan, sand the corners off the small 50mm fan to fit it inside the PVC pipe, with the flow of air directed toward the fog exit holes (Figure D). Connect this fan to your second potentiometer.
Connect both potentiometers to a 12V DC transformer that’s rated for a total amperage greater than the sum of the amperage of all your fans combined. In our fog screen we have 14 fans at 160mA and one at 100mA, totaling 2340mA, powered by a 12V 2500mA transformer. We were lucky and sourced the transformer from an old laptop but various 12V transformers with the needed amperage can be found on Amazon.
Figure EFigure F
Finally, make the fog skirt. Previous DIY and commercial fog screens have focused on laminar flow of the air from the fans to keep the fog in place. That’s awesome, but it adds too much weight and complexity for our needs. I found that a 4″-tall rectangular skirt made from corrugated plastic, running the length of the fog tube under the exit holes (Figures E and F), helps focus the fog on a thin line after exiting. The skirt can be secured with duct tape or with our 3D-printed supports.
Figure G
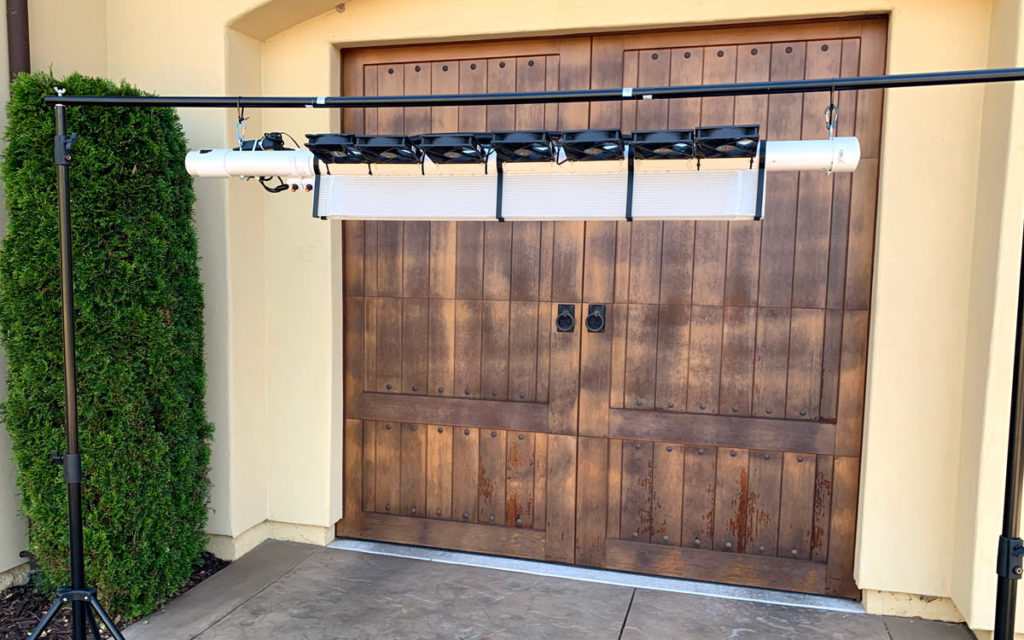
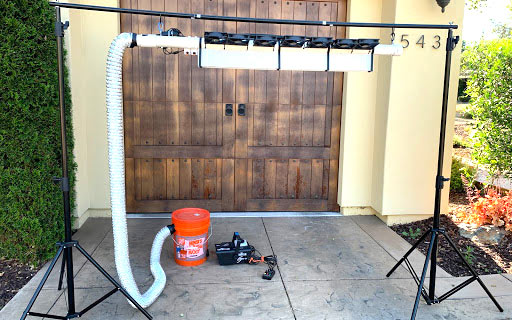
Eyebolts can now be drilled into each end of the pipe to suspend the screen with nylon cord (Figure G) without the need for scaffolding. The entire fog screen tube with fans and electronics weighs a mere 8½ pounds!
Ideally the fog should be cooled so it behaves “heavier” as it leaves the PVC tube and disperses less, which leads to a better projected image. But I have successfully used the fog screen without cooling the fog, by varying the speed of the fans. For a quicker build, this component may be skipped if necessary.
Figure H
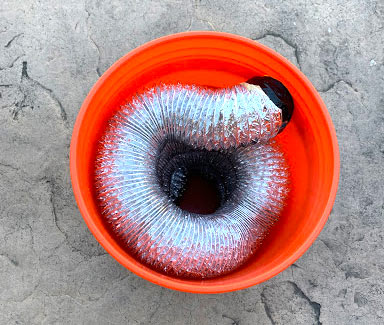
We run our fog through a simple 5gal cooling bucket. Cut two 3″ holes in the bucket wall, at the top of one side and the bottom of the other. I made these holes 180° from each other. Then coil 10′ of 3″ aluminum dryer hose from the bottom of the bucket to the top, exiting the holes and leaving the center empty (Figure H). Fill the bucket with dry ice for rapid cooling and put the lid on. Connect the top opening of the cooling bucket to the suspended fog screen with the remaining 10′ of dryer hose. All connections can be made with duct tape or our 3D printed parts.
Figure IFigure J
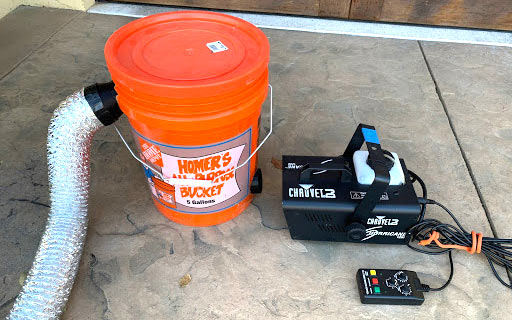
Connect the fog machine to the lower opening of the cooling bucket and your fog screen setup is ready to go (Figures I and J).
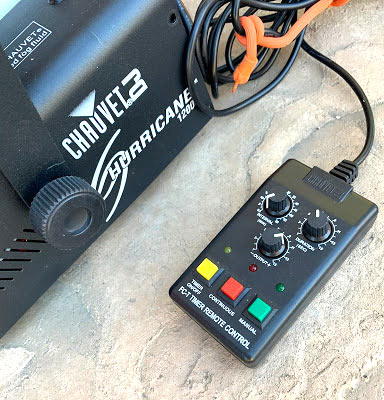
Don’t skimp. After much experimentation, I’ve found it’s crucial to get the right amount of fog for the situation. On a windless day with hyper-cold fog cooled by dry ice, you may need very little fog. On a windy day when you don’t have dry ice and the fog is warmer, you may need to output more fog. The fog must also run continuously. Most cheap fog machines run 100% for 40 seconds and then stop and have a refractory period before they fire up again; this is not acceptable for our fog screen. The best fog machine for the screen would be one with variable output and also on-demand output (Figure K). I found the Chauvet DJ Hurricane 1200 to be the best and least expensive fog machine that fit these criteria.
The final step is projecting onto the screen. Ghostly images and video loops can be found online, both open source and for purchase. A single ghost or phantom without any background usually projects very well (Figure L). I personally like the quality of the video loops at AtmosFX.com but you can project anything that you would project on a real projector screen.
Good projections can be made even with average projectors. Wait until dark, and try blocking unwanted ambient light near the screen, and varying the fog output and the fan speeds. For best results the projector must be behind the screen relative to the viewer, and after much trial and error, I’ve found that placing the projector at a higher elevation than the screen tends to result in less glare for the viewer.
The heavier the fog, the sharper the resolution of the projection, with crisp images and detail; but too much fog can fill an area quickly, ruining the effect. Lighter fog done just right is almost invisible, and the projection seems to materialize out of thin air like a hologram. Detail is harder to see with the lighter fog, and if it’s too light the projection may not be seen at all. It takes practice, varying the fog output, fog suction speed, and screen fan speed to achieve the desired illusion for the weather conditions that day.
Our fog screen has successfully entertained and scared many, for several Halloweens in varying weather including windy, warm, cool, and rainy nights. It even made an appearance indoors in the Dark Room at Maker Faire Bay Area 2018. With its lightweight construction and ability to modulate the various settings to account for conditions, it fills a new niche among fog screen builds.
I’d love to see your adaptation. Please share pics and questions @qebehsenuef.
Randell Vallero, M.D. is a physician working in gastroenterology who’s interested in all sorts of fabrication, including 3D printing. Prompted by PPE shortages, he and his son designed snorkel mask respirators, featured in Make: Volume 73.
When you buy through links on our site, we may earn an affiliate commission.
Our websites use cookies to improve your browsing experience. Some of these are essential for the basic functionalities of our websites. In addition, we use third-party cookies to help us analyze and understand usage. These will be stored in your browser only with your consent and you have the option to opt-out. Your choice here will be recorded for all Make.co Websites.
Allow Non-Necessary Cookies
Escape to an island of imagination + innovation as Maker Faire Bay Area returns for its 15th iteration!
Buy Tickets today! SAVE 15% and lock-in your preferred date(s).